How to Manage Multiple Printers in Business Central Without IT Headaches
If your business operates on Business Central and spans multiple locations, printing can quickly become a daily source of frustration. One team needs shipping labels on a Zebra printer in the warehouse. Another needs invoices on the office laser printer. Users print from web clients, tablets, and shared terminals. And IT? They’re fielding printer configuration requests as if it were 1998.
Fortunately, there’s a way to take control—without needing IT every time someone clicks “Print.” By connecting Business Central to PrintNode and utilizing the appropriate connector, you can automatically route print jobs to the correct printer with the proper settings, based on the user, the report, or both.
Listen To The Podcast
Why printing gets messy in the cloud
In traditional setups, printers are mapped through group policies or installed locally. But in a cloud-based Business Central environment, that model doesn’t scale. There’s no shared infrastructure, and users are working from diverse devices.
Even Business Central’s built-in printer selection tools can fall short when you need to:
- Route different reports to different printers.
- Change settings such as orientation, label size, or the number of copies.
- Assign logic by user, by report, or by company location.
That’s where PrintNode steps in—offering a cloud-based print service—and where the PrintNode Connector PowerTool makes everything work seamlessly inside Business Central.
A smarter way to manage printers
PrintNode allows you to link your physical printers to the cloud using a lightweight client. Once installed, printers become available for Business Central to see and use. With the PrintNode Connector PowerTool (a free app from Insight Works), you paste your API key once, and all available printers show up in Business Central for assignment.
From there, it’s easy to:
- Assign a report, such as “Sales Confirmation,” to the front office printer.
- Send all pick lists to the shipping printer for a specific warehouse.
- Set a fallback printer if no match is found.
- Configure print preferences, such as landscape vs. portrait orientation, 4×6 labels, or two copies per job.
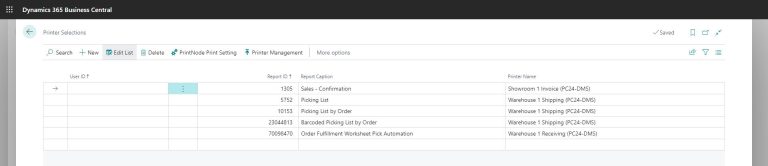
All of this is done within standard Business Central pages, such as “Printer Selections” and “Print Settings”—no separate portal or IT intervention is required.
Example: The Printer Selections screen below shows how specific reports (e.g., Picking List) are routed to the appropriate warehouse printer.
Control at scale
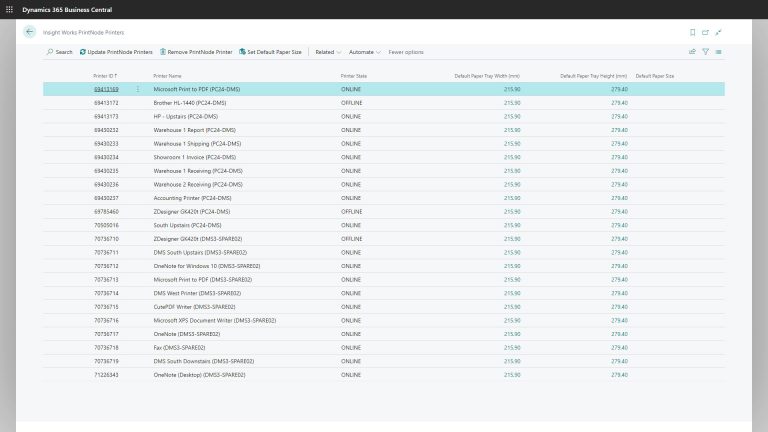
The PrintNode Printers list in Business Central provides a centralized view of all registered printers. Each printer is tagged with its name, state (online/offline), and default paper dimensions. You can quickly remove unused devices, set default paper sizes, and filter out virtual drivers, such as “Print to PDF” or “Fax.”
Example: The Printers list below shows multiple Zebra and office printers across locations, with online status at a glance.
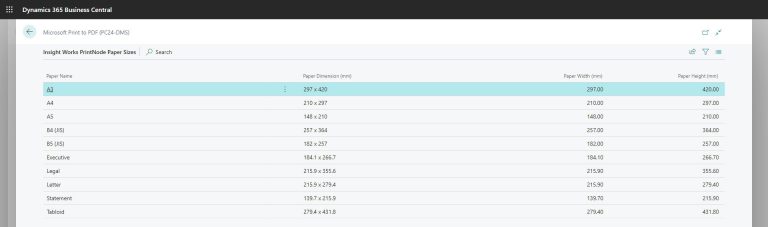
Even better, paper sizes are automatically pulled from the Windows printer driver. Whether you’re printing standard-sized reports or small-format barcode labels, Business Central already knows the dimensions.
Example: The Paper Sizes screen confirms the full range of supported sizes, including custom label formats.
Set it and forget it
Once configured, users don’t need to make selections manually. If a sales team member prints an order confirmation, it goes to the assigned office printer. If a warehouse user prints a pick ticket, it is sent to the correct label printer—landscape, two copies, 4×6 inches.
There are no PDFs. No pop-ups. No printing dialogs. Just one click → direct print.
What makes it possible
The free Insight Works PrintNode Connector PowerTool enables all of this: https://www.dmsiworks.com/apps/printnode-connector-powertool/
Takeaway
Cloud-based printing in Business Central doesn’t have to be manual or prone to errors. With the PrintNode Connector PowerTool and a PrintNode account, you can build a robust, scalable print infrastructure without the IT overhead.