Stop licking those postage stamps! How to email sales invoices from Dynamics 365 Business Central in six easy steps
Whether in your office or working remotely, sending invoices to customers doesn’t automatically mean printing, stuffing envelopes, and licking stamps. Previously, I shared how to set up ACH in Microsoft Dynamics 365 Business Central and how to set up Positive Pay in Business Central. Now it’s the Accounts Receivable team’s turn! Did you know that you can email your customers’ invoices as easily as you can print them?
Simply follow these six steps to emailing success. Make sure you read all the way to the end where I list tips for managing the transition process.
Step 1: Confirm SMTP Mail has been set up for your company
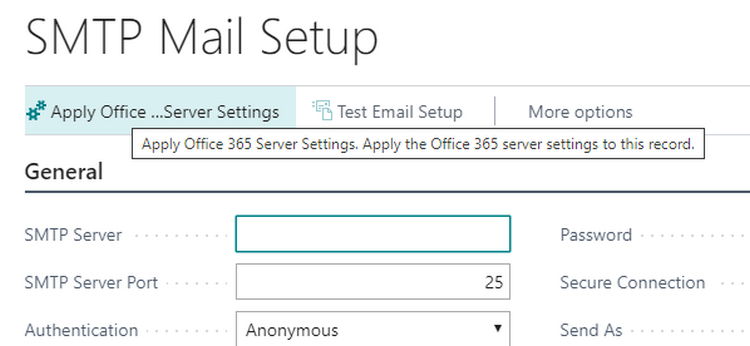
If you use Office 365, Business Central makes it easy to check or complete the setup. Just select Apply Office 365 Server Settings, then enter a User ID, password and the Send As email address.
QUICK TIP: If you are using an account that requires two-factor authentication, then the password that you enter in the Password field must be the same that you use for your Office 365 subscription and it must be of type App Password.

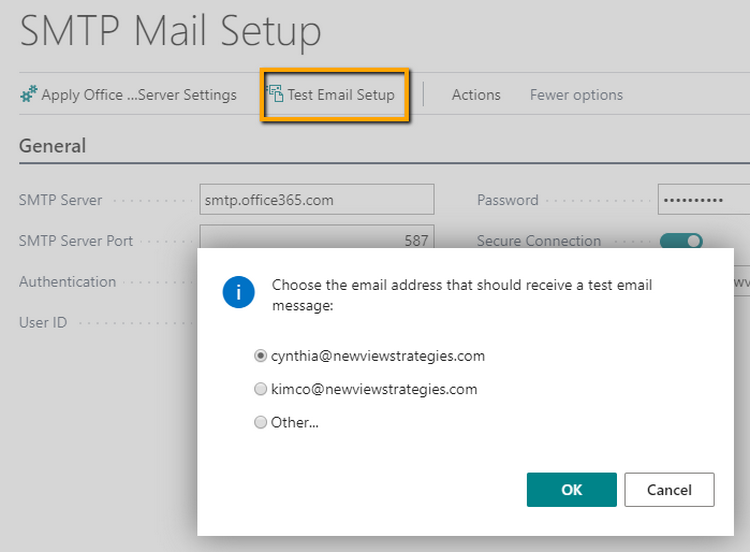
Test your email setup. If successful, you will receive an email at the address selected.

If the test fails, you will find the error code at the top of the setup page.

Step 2: Define Document Sending Profile
FREE Membership Required to View Full Content:
Joining MSDynamicsWorld.com gives you free, unlimited access to news, analysis, white papers, case studies, product brochures, and more. You can also receive periodic email newsletters with the latest relevant articles and content updates.
Learn more about us here
or
login
FREE Membership Required to View Full Content:
Joining MSDynamicsWorld.com gives you free, unlimited access to news, analysis, white papers, case studies, product brochures, and more. You can also receive periodic email newsletters with the latest relevant articles and content updates.
Learn more about us here